Since Windows Server 2003, Windows servers have been equipped with EMS (Emergency Management Services) for managing operations on headless servers, primarily intended for troubleshooting issues on Windows remotely.The Windows EMS feature relies on SAC (Special Administration Console) to function. Further information from Wikipedia mentioned below:
The SAC interface allows interaction with the Windows operating system via the serial (COM) port even when the system might normally be unresponsive, or if the system is embedded or headless (i.e. no keyboard/display present). An administrator can use SAC to access a command prompt, shutdown or reboot the machine, collect a crash dump, or view system information such as the hostname, OS version, running processes, or an IP address or addresses.
This functionality is currently included as an optional feature in all Windows operating systems by default.Within this article, we will explore the process of setting up EMS SAC on a machine that is operating within a Hyper-V virtual environment.Subsequently, we will briefly examine the various features that SAC offers.
In order for EMS to function properly, it is necessary to set up our guest machine in a way that allows the host to connect to SAC. If you want EMS setup on a physical machine, you may proceed directly to stage 2.
Stage 1: Setting Hyper-V machine for EMS connection
To enable EMS in your guest machine, a virtual COM serial port is required.If your VM is Gen 1, you will find the choice to establish a COM port in the VM settings. Simply specify a pipe value to connect to the guest EMS.
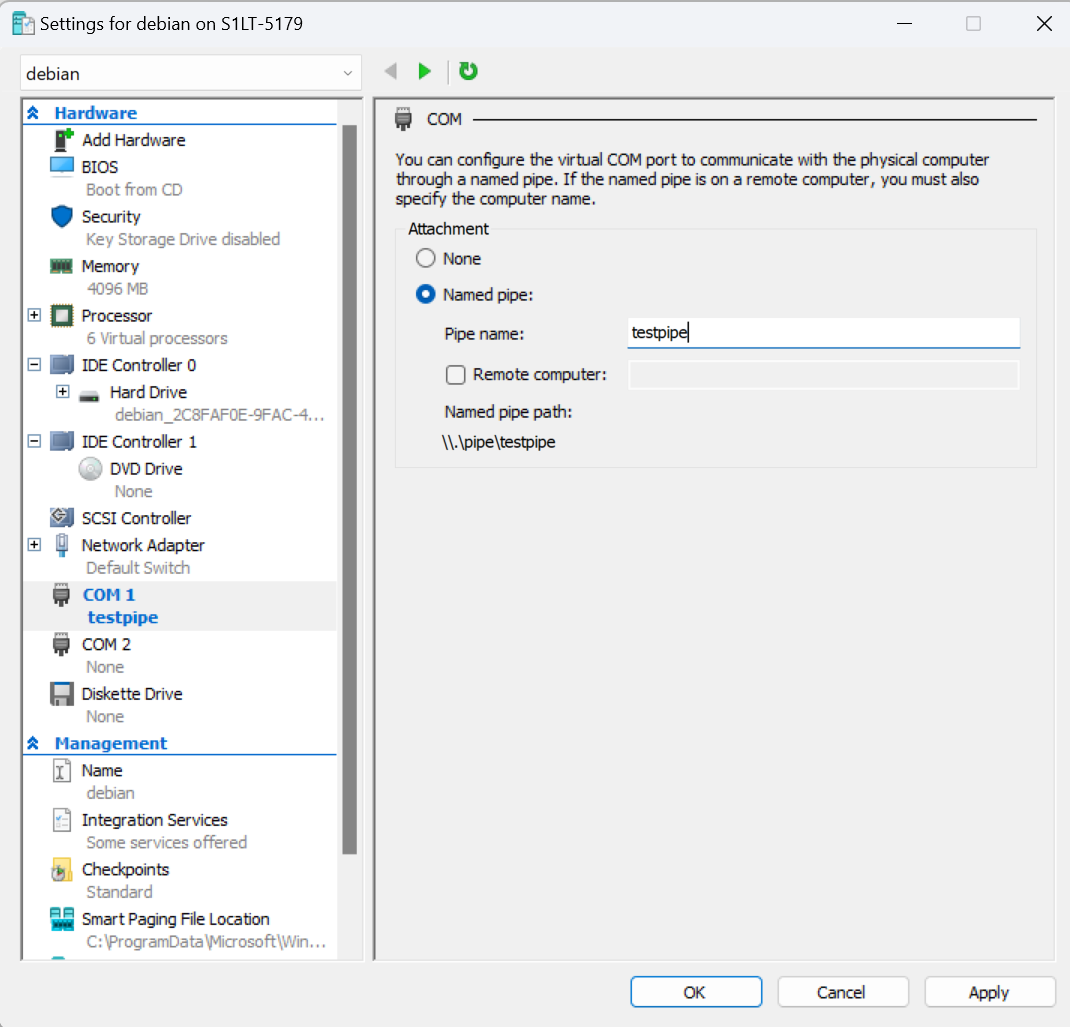
If you are running Generation 2 VMs, you have to use following commands to configure COM port.
Set-VMComPort -VMName "my win 11" -Path \\.\pipe\testcom -Number 1Here -Number 1 is for COM 1. -Path contained the named pipe that this virtual COM port will use in host machine. Once done, you can verify the setting using below Get-VMComPort command.
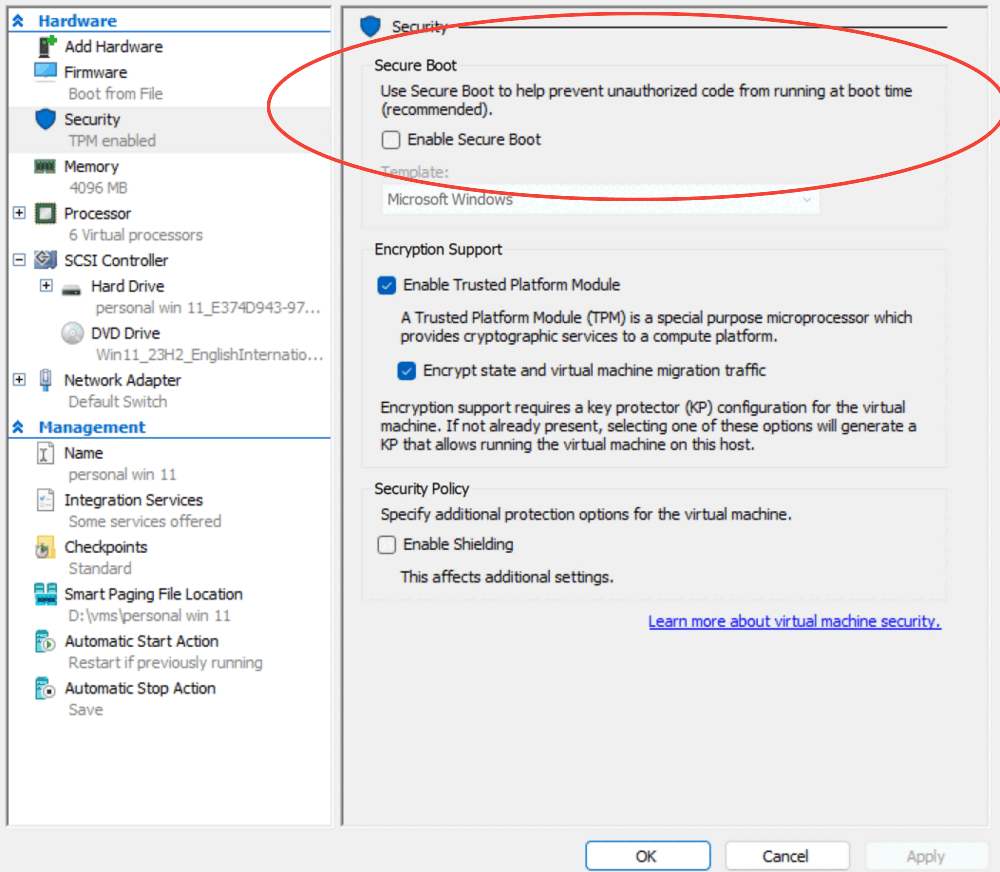
Get-VMComPort -VMName "my win 11"After this, next step is to turn off secure boot which is required since we are going to modify certain firmware setting using bcdedit.
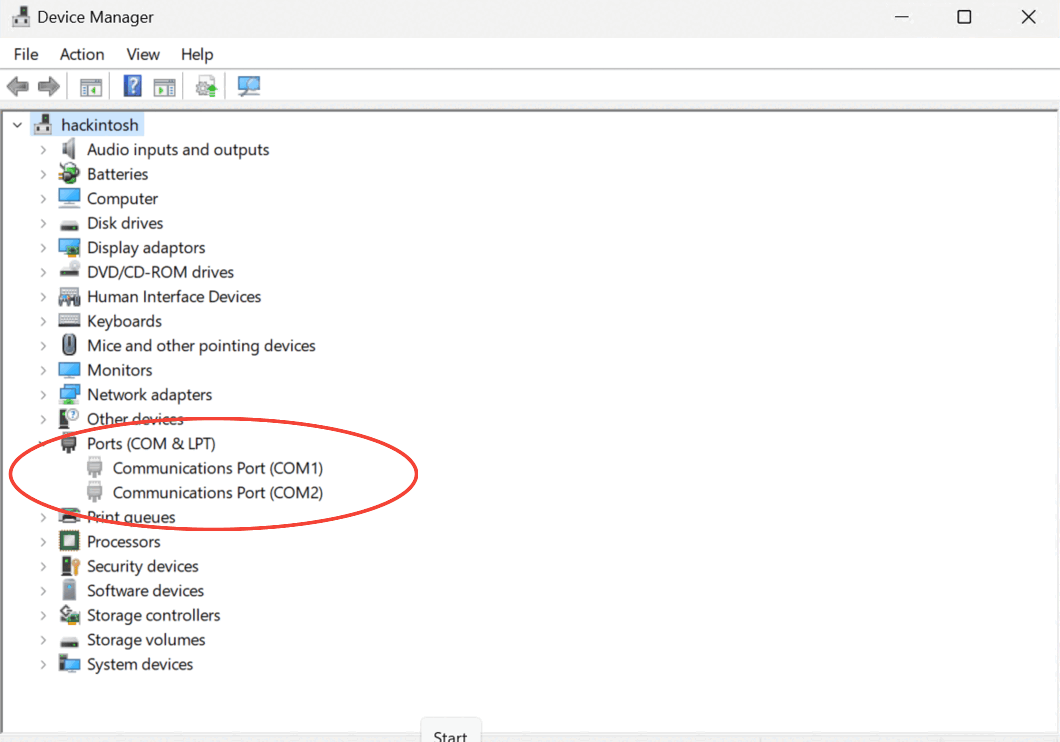
To verify that the guest is able to detect virtual serial port, you can check the device manager. You will see 1 or both (depend on how many you configure) COM port here.
Now, let's see how you can configure the guest VM for EMS SAC setup.
Stage 2: Configuring Guest machine for EMS.
Inside the guest, the initial step you should take is to install the optional feature of EMS SAC. For windows 11 it will be named something as EMS and SAC Toolset for Windows (client edition). To set it up, type "Optional features" in the search bar, proceed to "add an optional feature", and look for "EMS and SAC".Select install to proceed with the installation. After installation, a similar interface will be visible in optional features.
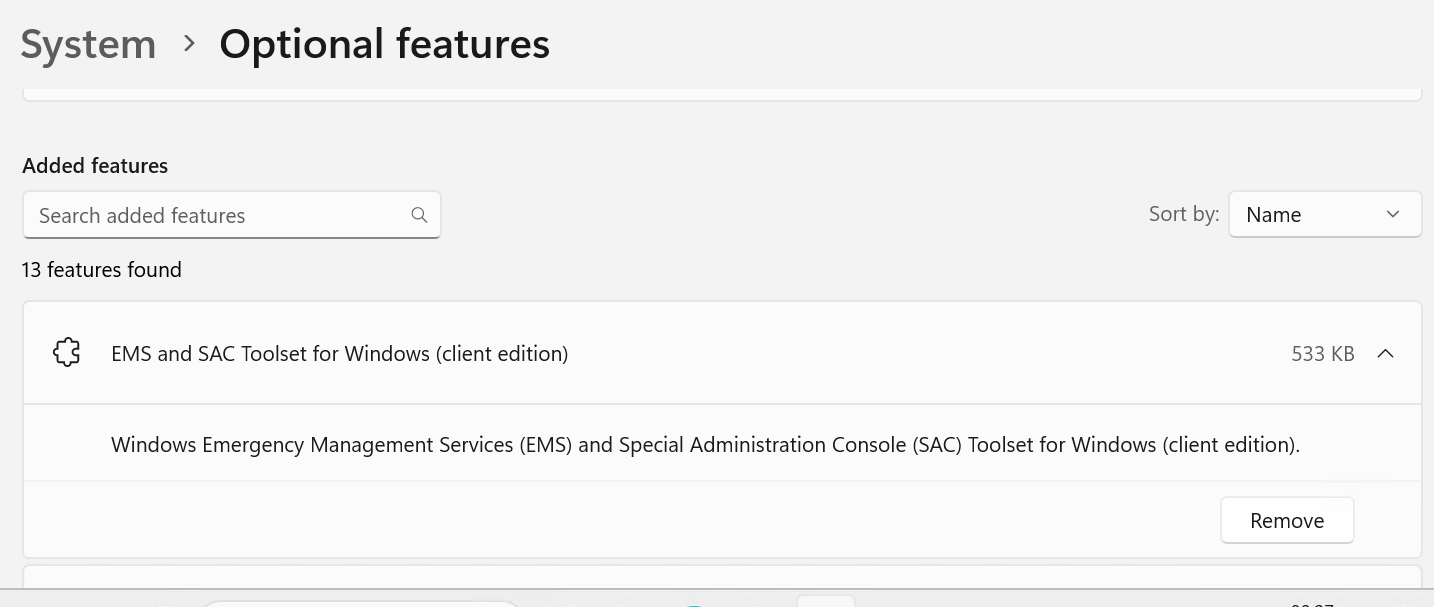
Once install, reboot the machine.
The next step is somewhat precautionary, but it will assist us in connecting to the SAC at the appropriate booting time. During this step, we will enable the legacy boot option in the guest machine. To accomplish this, you can execute the following bcdedit command:
bcdedit /set {default} bootmenupolicy legacyTo see the boot options during booting, you need to add a dummy boot entry. You can use following bcdedit command to do it.
bcdedit /copy {current} /d "DebugEntry"This will just copy the existing boot entry with new name DebugEntry. More info on boot entries: here.
You can verify the boot entry is added or not using msconfig : Goto msconfig-> Boot.
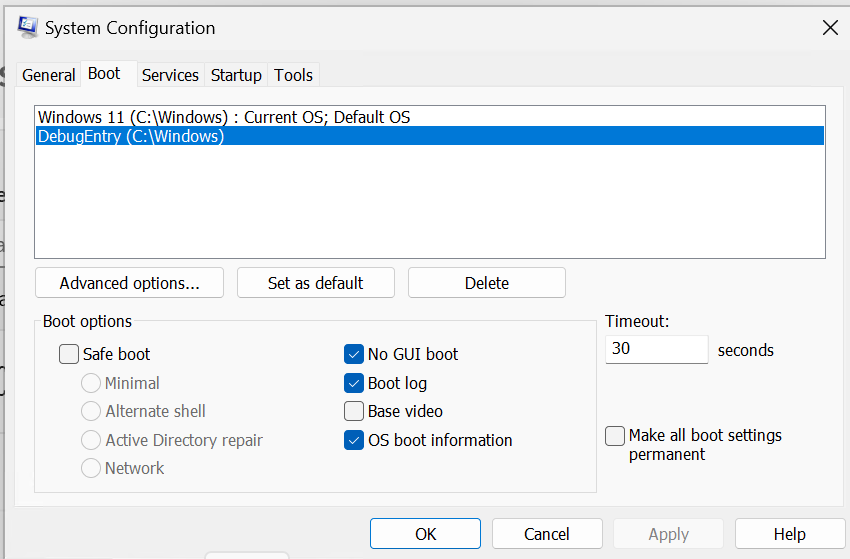
Once done, now as a final step we have to turn on and configure EMS using bcdedit. You can run below command to do that.
bcdedit /ems ON

bcdedit /emssettings EMSPORT:1 EMSBAUDRATE:115200
EMSPORT:1 refer to serial COM 1 port. Please remember the baudrate as it will be necessary for the connection later on.
It's time to reboot the machine.
On reboot, you will greet with following Boot option menu:
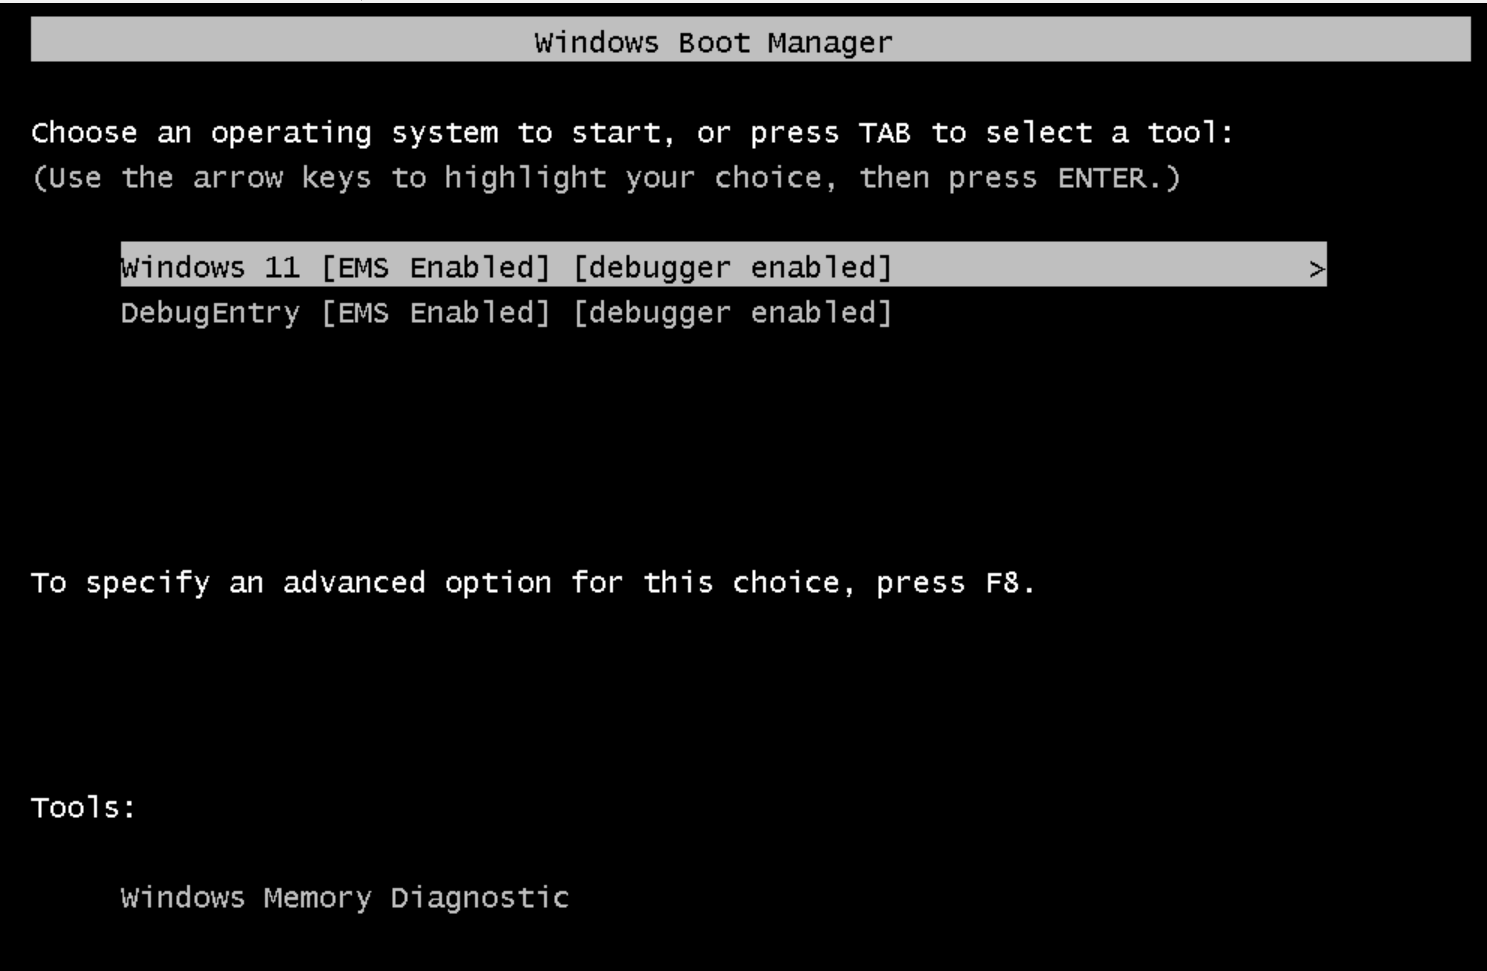
you can see the flag [EMS Enabled] in boot entry name. This means that the EMS is configured correctly. Now, to connect to the COM serial port, you can use putty for connection(remember to start it with administator privilege).
Inside putty, set the connection type to be "Serial". Put the pipe name on Serial line and set the correct baud rate (115200 in our case).
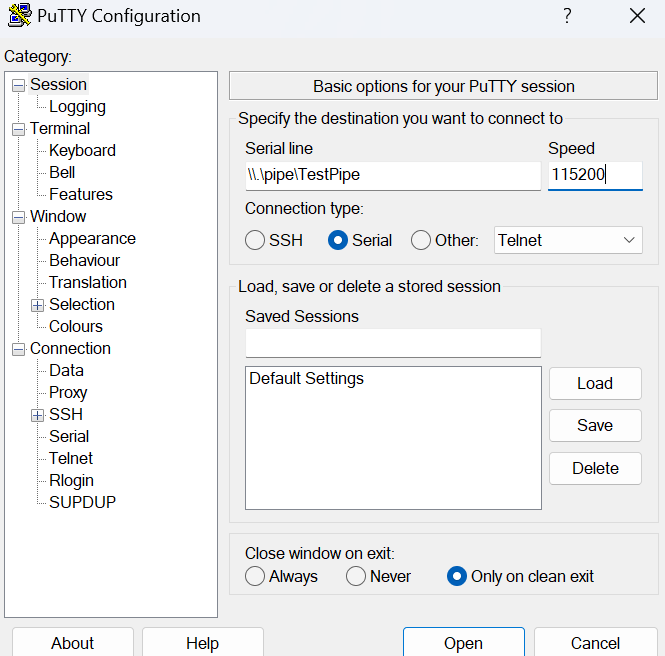
Click on open and continue with booting process. You will be greated with SAC prompt on putty.
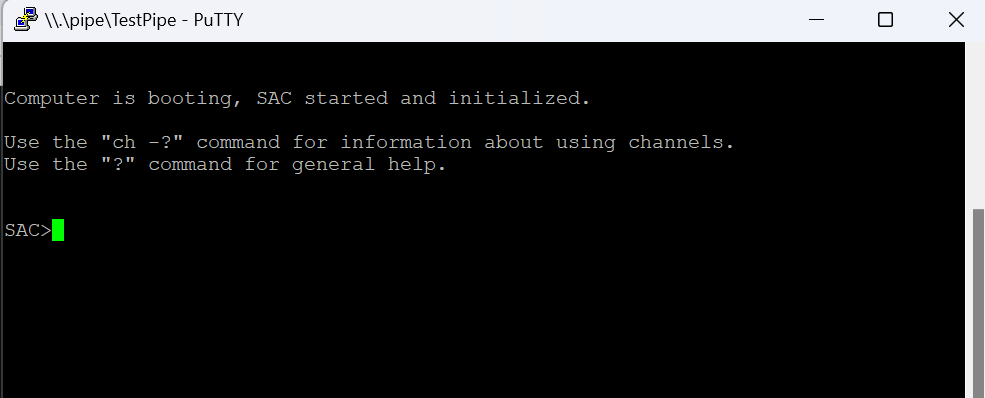
Playing with SAC interface
The EMS SAC interface contain following features:
cmd                  Create a Command Prompt channel.
d                    Dump the current kernel log.
f                    Toggle detailed or abbreviated tlist info.
i                    List all IP network numbers and their IP addresses.
i <#> <ip> <subnet> <gateway> Set IPv4 addr., subnet and gateway.
id                   Display the computer identification information.
k <pid>              Kill the given process.
l <pid>              Lower the priority of a process to the lowest possible.
lock                 Lock access to Command Prompt channels.
m <pid> <MB-allow>   Limit the memory usage of a process to <MB-allow>.
p                    Toggle paging the display.
r <pid>              Raise the priority of a process by one.
s                    Display the current time and date (24 hour clock used).
s mm/dd/yyyy hh:mm   Set the current time and date (24 hour clock used).
t                    Display the task list.
restart              Restart the system immediately.
shutdown             Shutdown the system immediately.
crashdump            Crash the system. You must have crash dump enabled.
livedump [-u] [-h]   Create a live kernel dump. Optional arguments will include
                     userspace (-u) and hypervisor (-h) memory in the dump.
livedump -s <Flags>  Create a selective live kernel dump. Default flag is 0x1.
It is expected that EMS will be helpful in cases where the system hangs and behave slow. To troubleshoot the issue, following features are implemented in EMS:
- Lower the process priority
- Limit the memory usage for a process
- Kill the process
- Raise the priority of a process
In case of crash or bugcheck during booting, following options can be used.
- Display the kernel log
- Generate crashdump
- Generate kernel livedump
For all other troubleshooting cases, you can spawn a command shell. To start the command shell, you can use following shell command:
SAC>cmd
The Command Prompt session was successfully launched.

EVENT:   A new channel has been created.  Use "ch -?" for channel help.
Channel: Cmd0001

SAC>ch -sn Cmd0001
This will start the command prompt which is similar to having remote ssh shell for windows.


