
Developing and Installing your first Kernel driver in Windows 10(under 10 min)
Windows kernel development is painful to follow after lots of changes in driver handling by windows. In this article I will help you with developing and installing your driver in less than 10 minutes in windows 10.

Microsoft always does significant changes in windows kernel and the way to communicate with kernel in every new release and make it difficult to follow the old method of doing certain stuff. Over that, the scattered and less interactive official documentation is always painful to follow. Same goes with windows driver development and loading of driver. The old methods available online doesn't work anymore due to introduction of multiple new features and handling tools like code signing etc.
Since I myself have faced a lot of difficulties in finding a correct way to compile and load the windows driver. I have decided to write a quick guide to help others to do that job in less than 10 minutes for windows 10(excluding downloading and installation time).
Installation
Note: I am using visual studio 2019 for this tutorial.
- For kernel driver development it is obvious that you need to have Visual Studio installed on your machine. Inside visual studio installer you need to select the "Desktop development with C++" checkbox(other workload packages are optional according to your need).
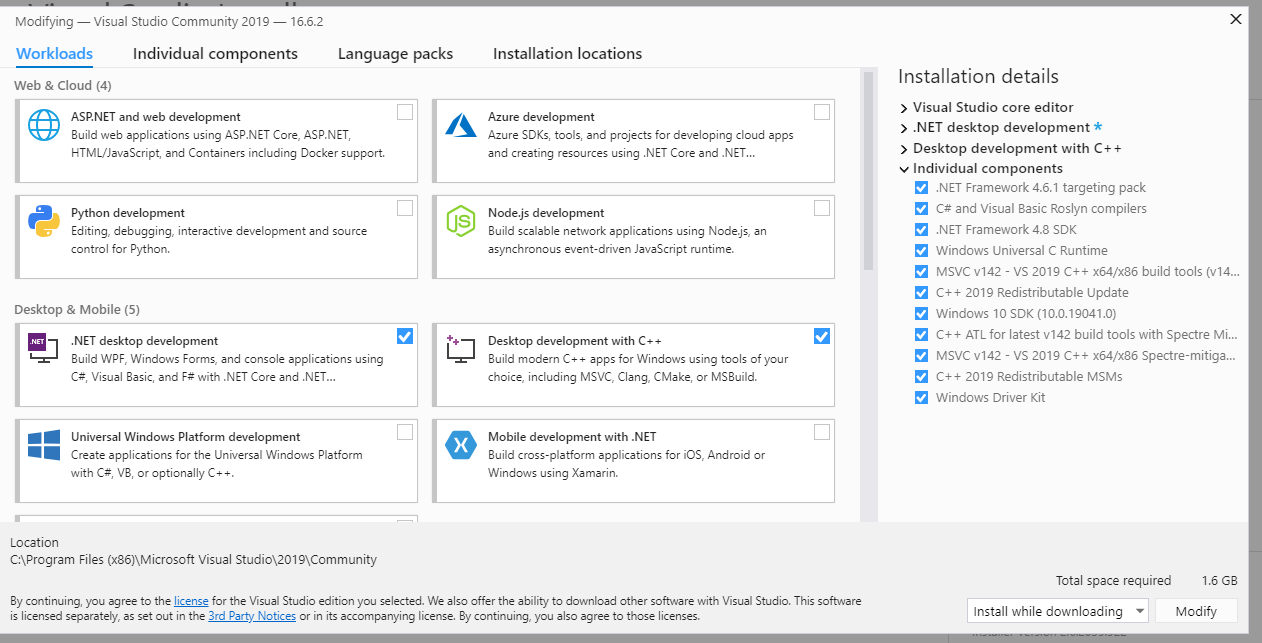
Note: Don't forget to check the package named MSVC's latest version with Specter-mitigation( as shown in last 3rd checkbox in right list of above image) rather than the one without specter-mitigation. Otherwise while compiling your driver, you will get a dependency missing error .
Setup and development
Since we have already installed the dependencies by now. We can create our first test driver. For this, follow these steps.
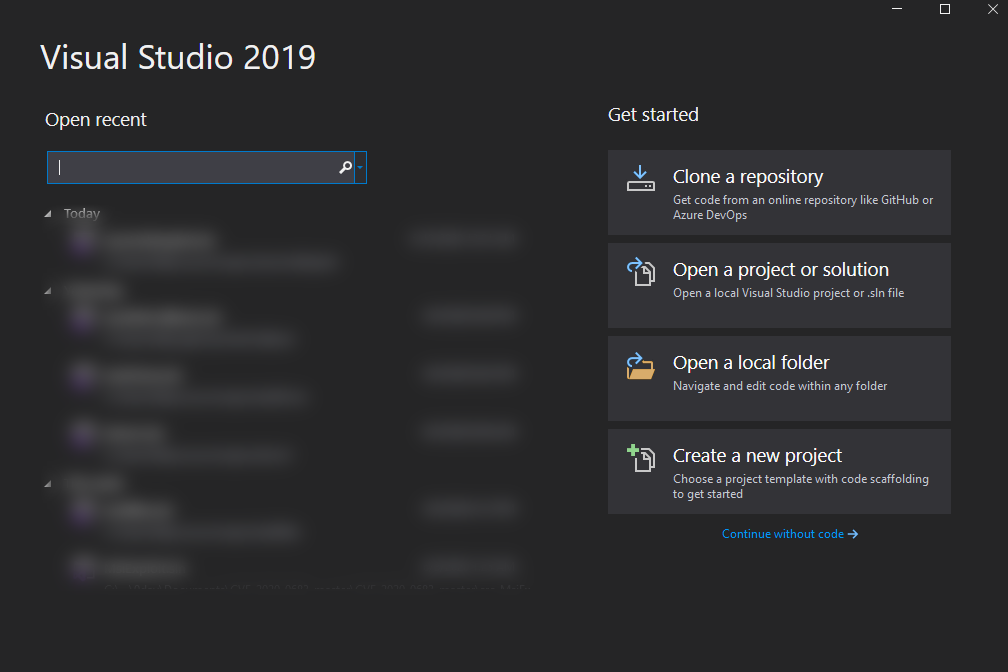
- Open visual studio and click on "Create a new project"
- Select the Driver option in project type.
- Select the Kernel Mode Driver(KMDF). Enter the details on the next prompt.
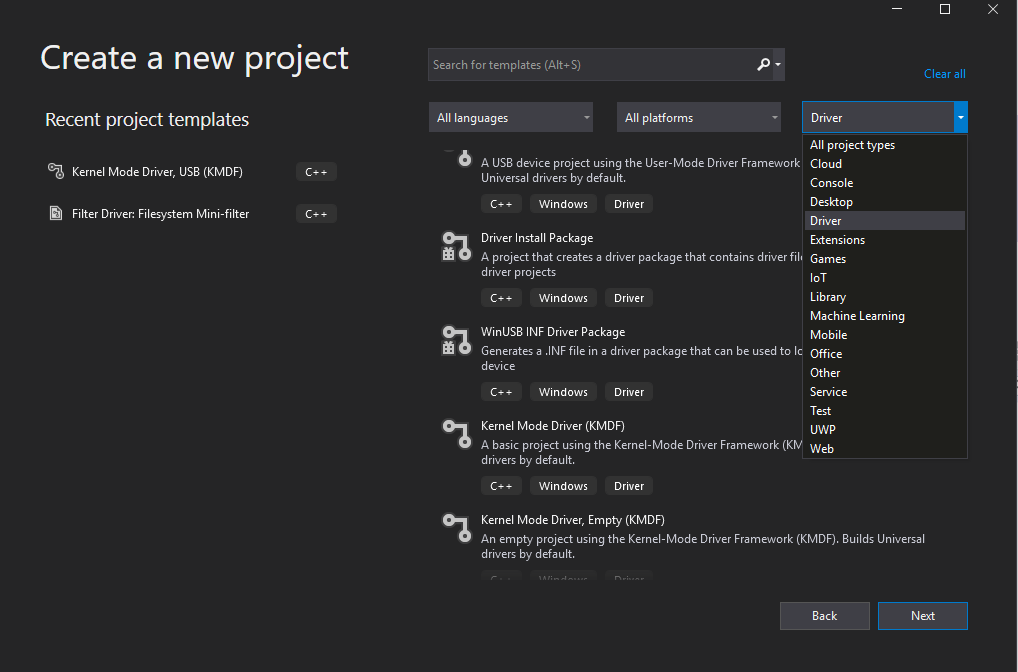
If you can't see the Driver option then you must have not installed one of the component mentioned in Installation section. Also verify that the sdk and wdk package have same version and try to install the WDK extension again from %programfiles(x86)%\Windows Kit\{WDK version}\Vsix\{Vs Version}\WDK.exe location.- Add a new file by right clicking on source files in upper right box. Then Add-> New item ->C++ file. Give the name filename with extension
.c. - Choose correct target architecture.
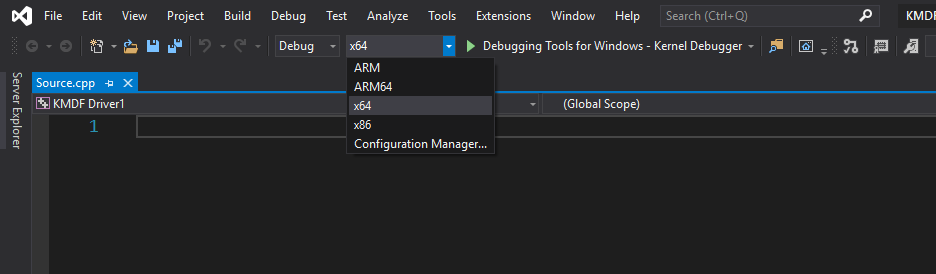
- Now start the coding
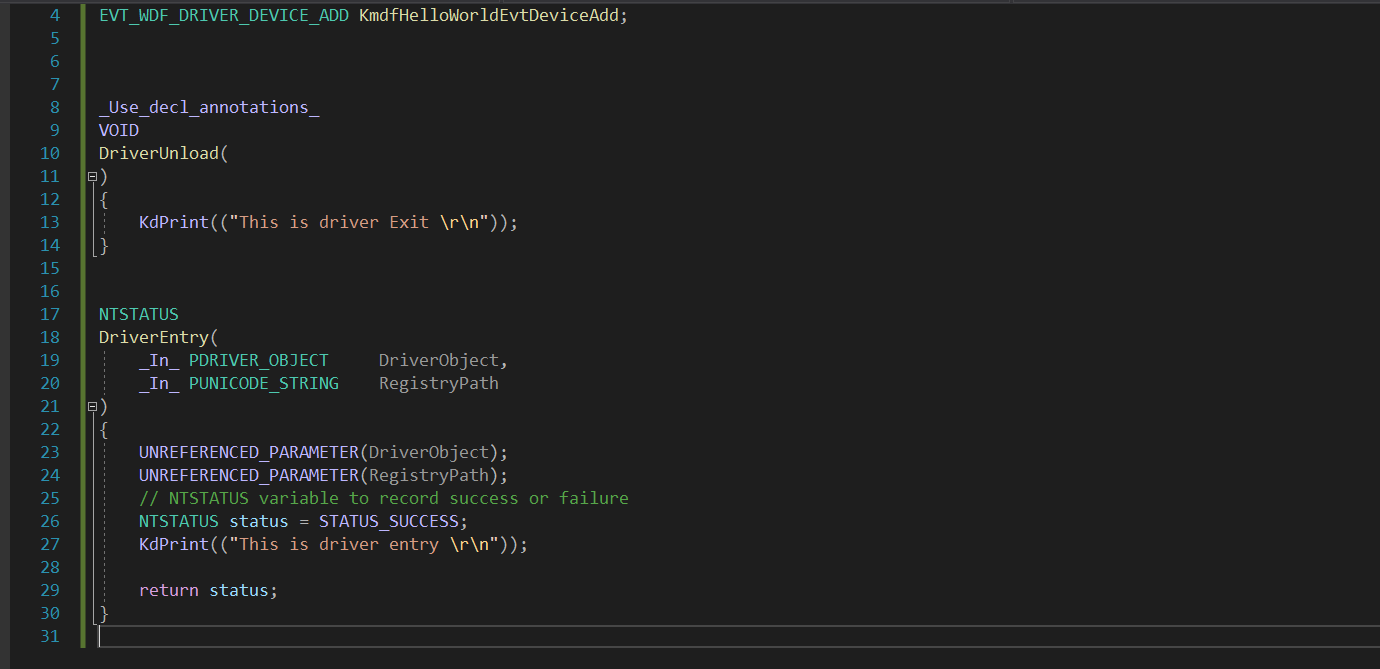
Let's put a minimal code here that will just print a string on driver loading and unloading.
#include <ntddk.h>
#include <wdf.h>
DRIVER_INITIALIZE DriverEntry;
EVT_WDF_DRIVER_DEVICE_ADD KmdfHelloWorldEvtDeviceAdd;


_Use_decl_annotations_
VOID
DriverUnload(
)
{
    KdPrint(("This is driver Exit \r\n"));
}


NTSTATUS
DriverEntry(
    _In_ PDRIVER_OBJECT     DriverObject,
    _In_ PUNICODE_STRING    RegistryPath
)
{
    UNREFERENCED_PARAMETER(DriverObject);
    UNREFERENCED_PARAMETER(RegistryPath);
    // NTSTATUS variable to record success or failure
    NTSTATUS status = STATUS_SUCCESS;
    KdPrint(("This is driver entry \r\n"));

    return status;
}
DriverEntry is the entry point, that will going to execute when you will load the driver.
DriverUnload is the exit function that will execute when you unload the driver.
- Compile the code by clicking Build->Build Solution.
Configuration
Configuration is the most important part to make driver loading work. Usually it is recommended to do the testing of driver on other machine then the development one, but we will do everything in same machine because that's what most people do on their initial development phase(also we are too lazy to use two machines).
- Turn on loading of our test signed drivers.
bcdedit /set testsigning on
- Turn on kernel debugging.
bcdedit -debug on
- Create a DWORD value
IHVDRIVERunderHKLM\SYSTEM\CCS\Control\Session Manager\Debug Print Filterand set the value to0xf. - Reboot the machine.
Deployment/Loading
To load our driver we will be using devcon tool that is part of WDK. devcon require following driver related file in the same directory.
- .sys - driver file
- .inf - configuration file
- .cat -catalog file
They must have been already generated after you have build the driver.
In case there is no catalog file created, you can use inf2cat to generate one. You can use following command for this Inf2Cat /driver:C:\MyDriver /os:2000,XP_X86,XP_X64,Server2003_X86,Server2003_X64,Vista_X86,Vista_X64. The tool will look for a .cer certificate file in the same folder which should be created while building the driver. Refer here for more info.
you can run the following devcon command from the folder having all above mentioned file to load the driver
& 'C:\Program Files (x86)\Windows Kits\10\Tools\x64\devcon.exe' install .\KMDFDriver.inf Root\MyDriver
Use admin privilege for above command.
Root\mydriver is your hardware id that will be present in the .inf file.
[Standard.NTamd64]
%KMDFDriver1.DeviceDesc%=KMDFDriver_Device, Root\MyDriver ; TODO: edit hw-id
To unload the driver you can use following command
& 'C:\Program Files (x86)\Windows Kits\10\Tools\x64\devcon.exe' remove Root\MyDriverDebug logs
You can check the debug logs using dbgview which is part of sysinternal suite. Run it as admin and check following options(you may require to do a restart to make it work) .
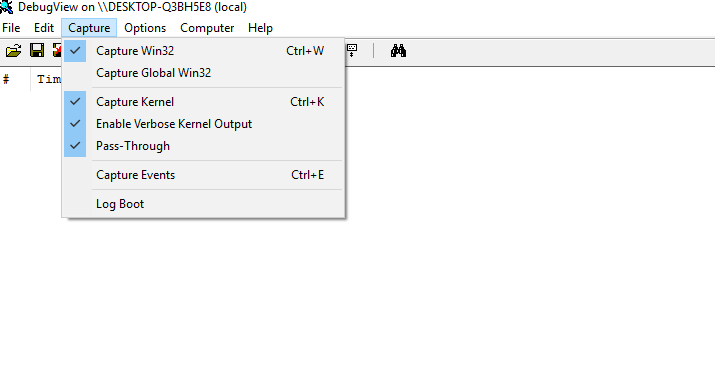
Now next time when you install the driver, make sure dbgview is running in the background. After loading, you will see the string from DriverEntry in dbgview.
Deploying/Loading a filter driver
Most of the time our driver is just a mini filter driver which doesn't require the use of devcon to get loaded. For minifilter drivers follow below steps after build
- Open filter's ini file and update all the TODO values with the values mentioned in the comment.For example: updating
ClassandClassGuid

- In the same file update
Instance1.Altitudewith the value361000or refer following link for other possible values range. - Install the
.inifile with right click-> install - load the driver with
net install drivernameand unload usingnet stop drivername